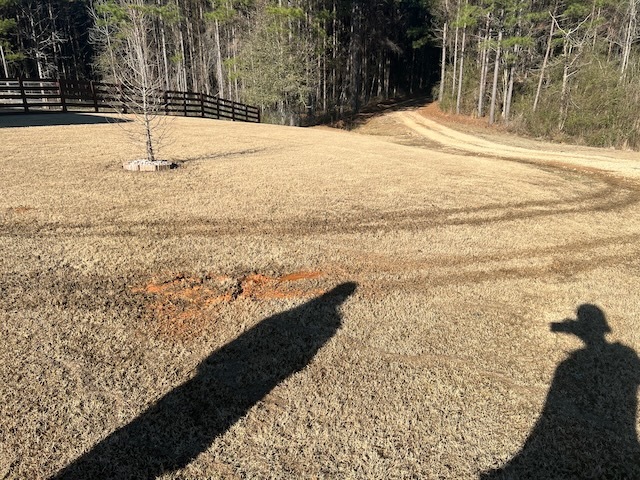
our ranch has a long gravel driveway with separate paths going to the barn vs the house. sometimes i get lazy (empowered?) and cut corners to feel like a badass.
big. mistake.
"never drive over water lines" said the plumber ($472) who showed up at my house, just a few hours after i called my utility's emergeny hotline to report a disruption.
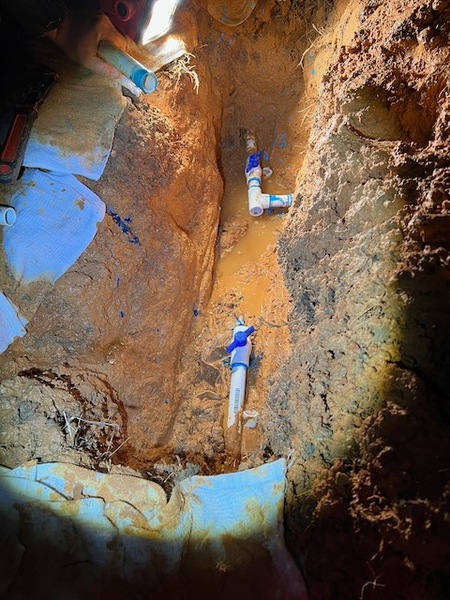
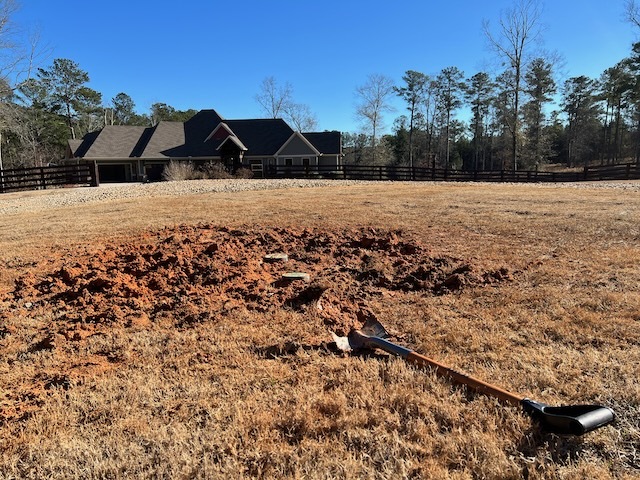
my ugly tire treads and a patch of mud with running water
in situations like this, the city's responsibility ends at the meter. a technician came out, shut off our water from the street, took a look at what happened, and told me this was likely due to the overnight freeze on Christmas Eve. he said my truck rolling over it was a coincidence. we'll see.
with a quarter mile of pipe running from the street to this location, i figured we're in for a doozy. first stop: Google Maps to call every local plumber.
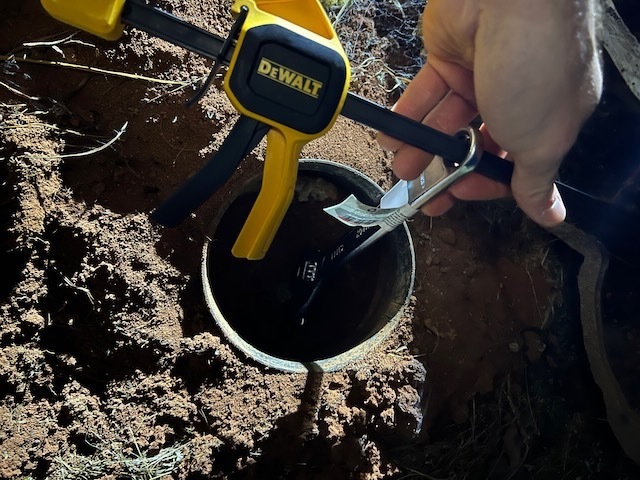
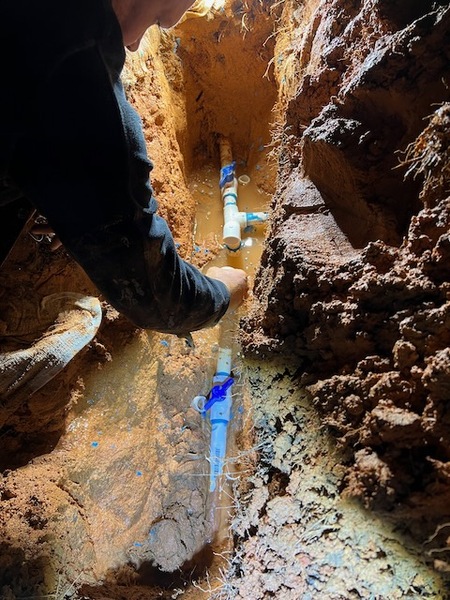
lucky for me, the 2nd guy i called came right over to diagnose the problem. while he dug around with a shovel, i hung out at our meter and cracked the water on/off during a live phone call.
turning the valve open/closed with a jerry rigged tool: crescent wrench + clamp
diagnosis: at the T-point where our piping splits in two directions (house, barn) the connection towards the barn had cracked, thus the gushing water.
fixing the problem
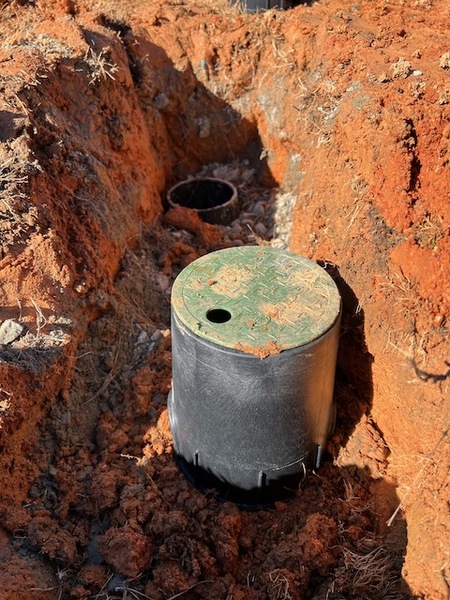
the plumber was prepared for a simple fix -- replacing the coupling at the 3-way joint. but i asked if we could do an upgrade: separate valves for the house vs barn, and ground-level boxes for easy access in the future.
plumber removing the broken 3-way connector
Jed the Plumber said "well, this is a once in a lifetime chance..." and after a quick trip to Home Depot we had the materials needed ($75) to improve our system.
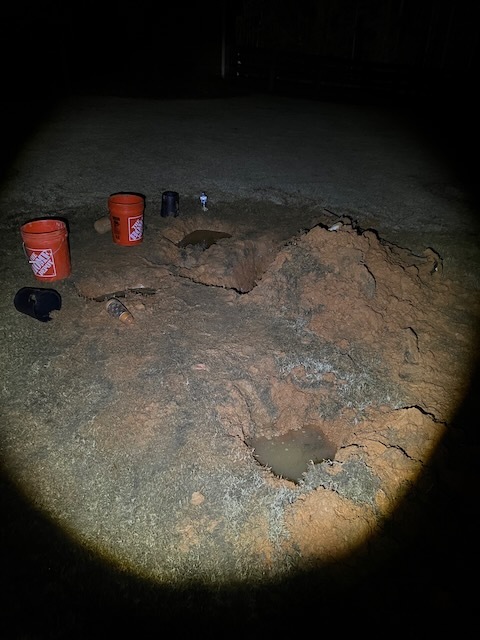
by the way, here are all the holes he had to dig to pinpoint the problem.
digging for gold - sort of
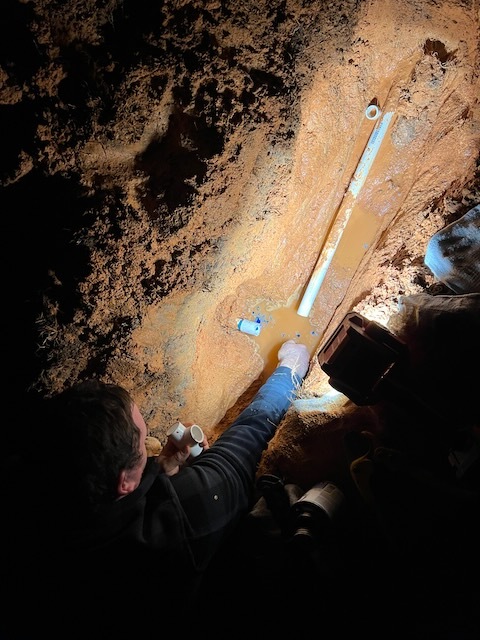
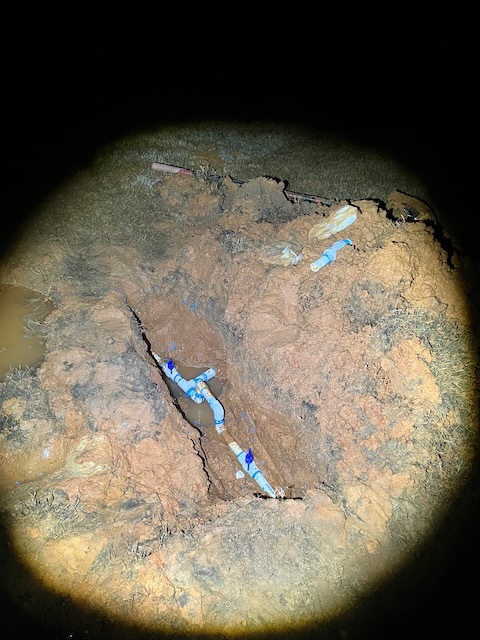
Jed replaced the 3 way connector, added valves on both sides, then began measurements to insert an extender. this is basically a piece of PVC that can expand around 6 additional inches. for situations like this an extender is perfect, as you can telescope it to fill a gap.
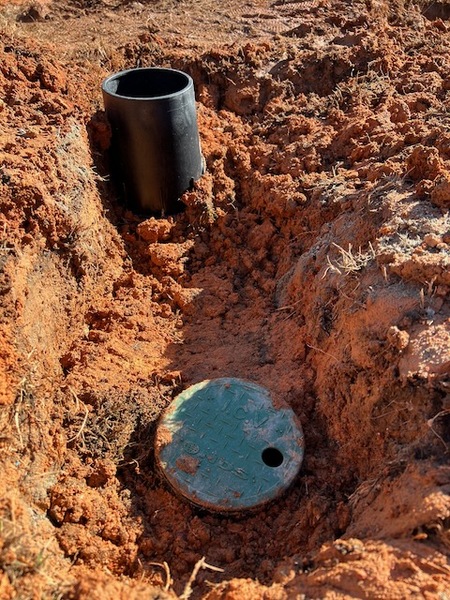
2 new valves in place (top - barn, bottom - house)
measuring the gap for an extender
unfortunately, we botched the extender step due to the slight bow in the top/bottom lines giving us a less than perfect fit. to solve this he did a 90' offset. this is where you reset your connection "bind" by going up and around the imperfect gap.
see that Mario-style piping that comes up, over, then back down?
nobody will ever see this, so whatever. we back-filled the surrounding area with spare gravel and sand already on our property, because according to the plumber this ground will never be as strong as it once was, following the leak's unsettling of clay.
a 6" layer of gravel and sand surrounds the new valves and boxes
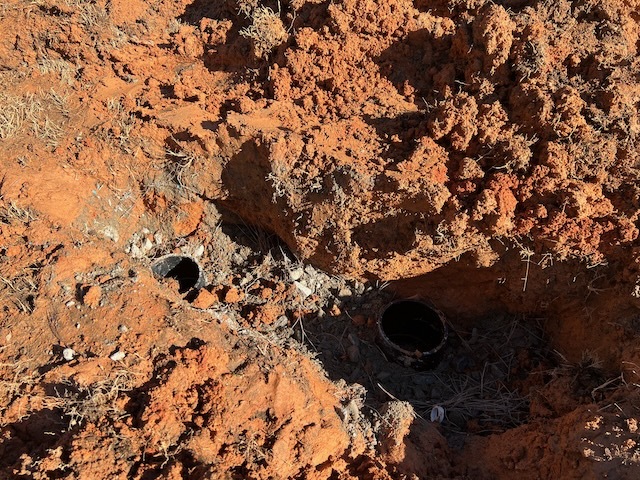
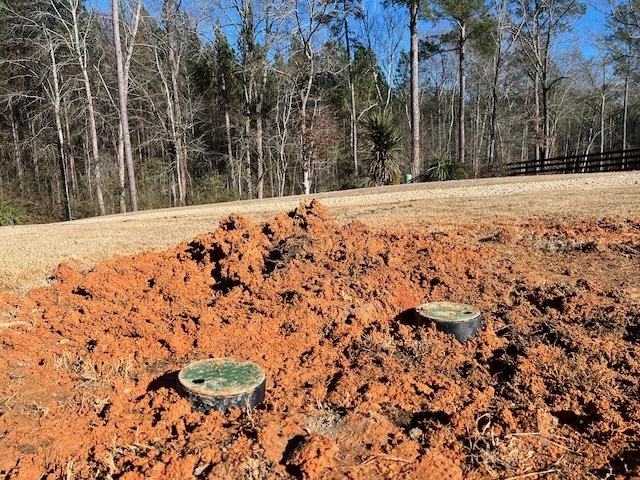
Jed finished at 10p after it had been dark a few hours, so i got back to work first thing the following day. since this system is a couple feet deep, more boxes were needed to create a clean passageway from the ground level to the valves.
extending the valve box
we needed 4 more ($9 /each)
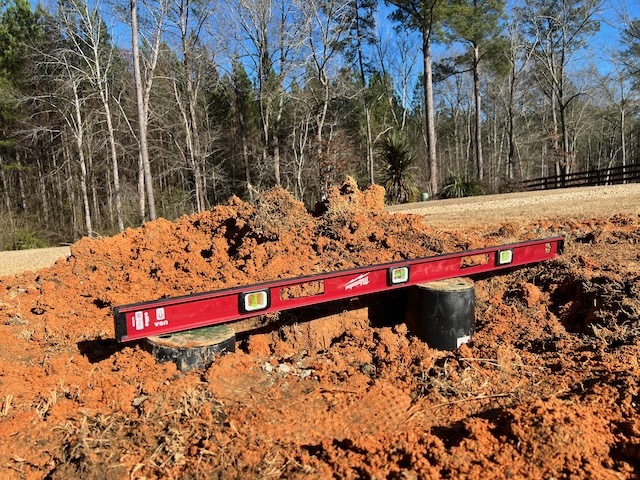
as i added each box extension i packed in new dirt (mud) around it. when i finally made it to the surface i used our level to make them even.
perty ain't it?
unnecessary optimization
fixing the bigger problem
running water is cool and all, but what are we supposed to do with this ruined patch of yard?
a very bad place to bury a body
landscape a new island, of course!
the island
like 99.9% of the projects on this ranch i've never done this before so forgive my "taste." here's how it all went down.
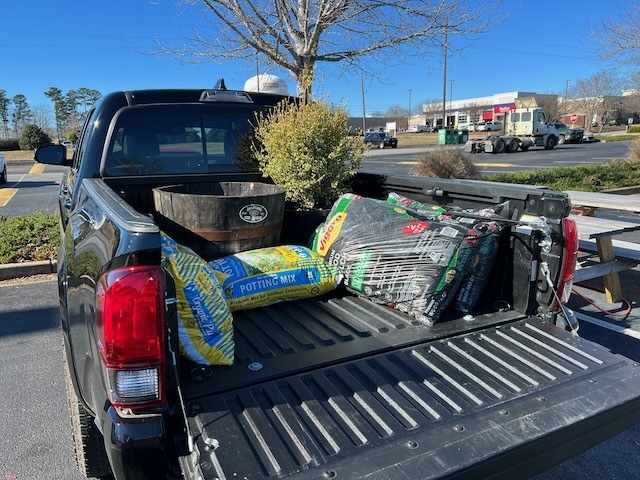
first stop, Home Depot. duh.
buying soil, a Jack Daniels whiskey barrel ($51), boxwood tree ($59), and mulch ($11.91)
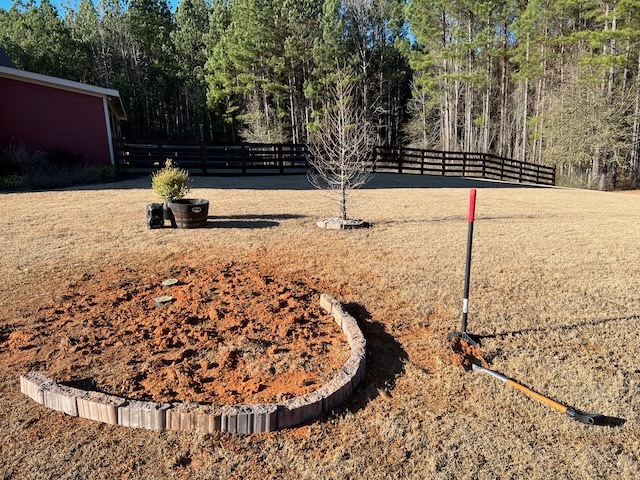
next i gathered all the remaining spare pavers from our property to define the edges.
believe it or not, i had to shovel a ton of dirt around to get *this* even
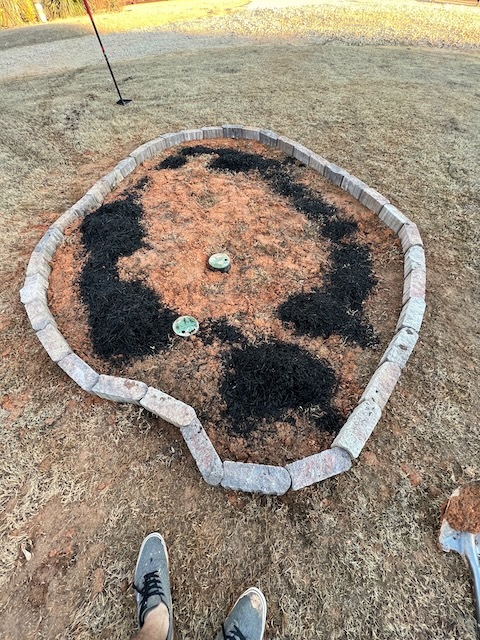
then i began adding mulch. here's the first bag.
i got on my hands and knees to spread it evenly
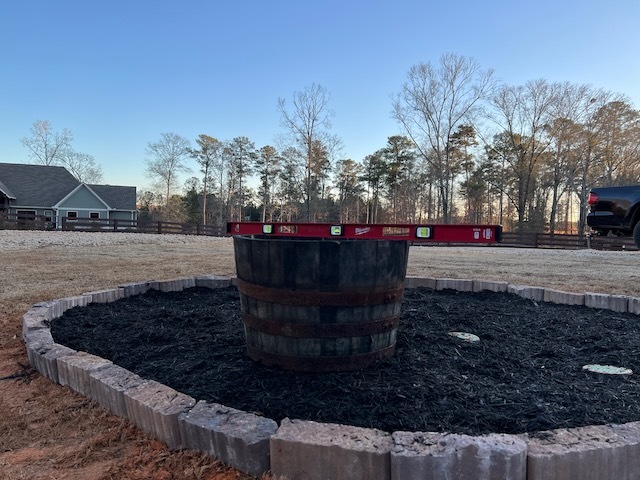
our 3 bag calculation was just enough, so i put the whiskey barrel on the small mound i created and leveled it.
more overkill by Ryan
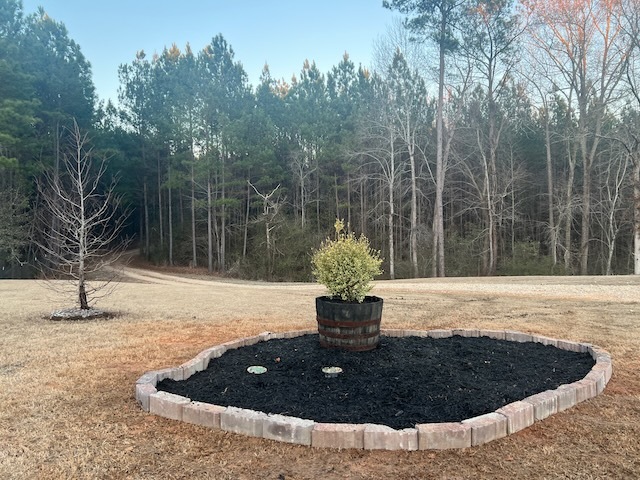
by the time i potted the small tree, it was dark again. this has now become a 3-day project.
view of the island with barn to left, house to right, driveway in front
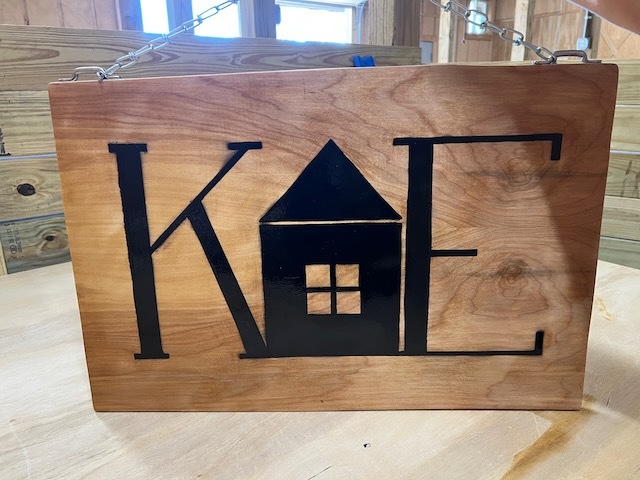
on New Years Day we wrapped things up with a homemade Kulp Estates sign. i cut a 24x16" piece of 1/2" birch plywood from the power tool shelf leftover pile, then attached some chain ($6.27) and fasteners ($4) from Tractor Supply. to top it of we sprayed a couple coats of waterproof polyurethane ($7). the spray paint was $5.
there are many signs, but this one is mine
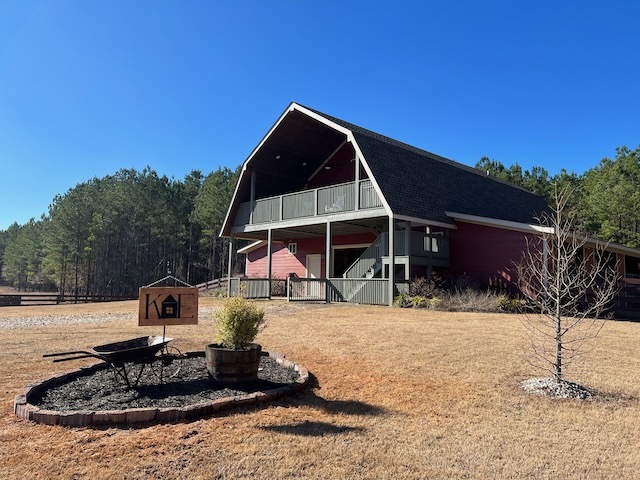
with just a sign and bush in this big island, things were looking a little sparse. a bit thirsty. a bit like the island was made by someone who has never made an island before.
and then we found the wheelbarrow. this was covered in disgusting mud and dead plants elsewhere on the property, so we put it to good use.
the wheelbarrow represents hard work(?)
as you can see, the immediate area surrounding our island is still in rough shape. we'll patch it in the spring when bermuda grass can grow again.
although it sucks to blow up your water supply, at least we managed to improve our new guest first impression on the drive-in. we also learned a valuable lesson: never drive on water lines!